
Trial Guide: Maw of Lork'haj
Entering the Trial:
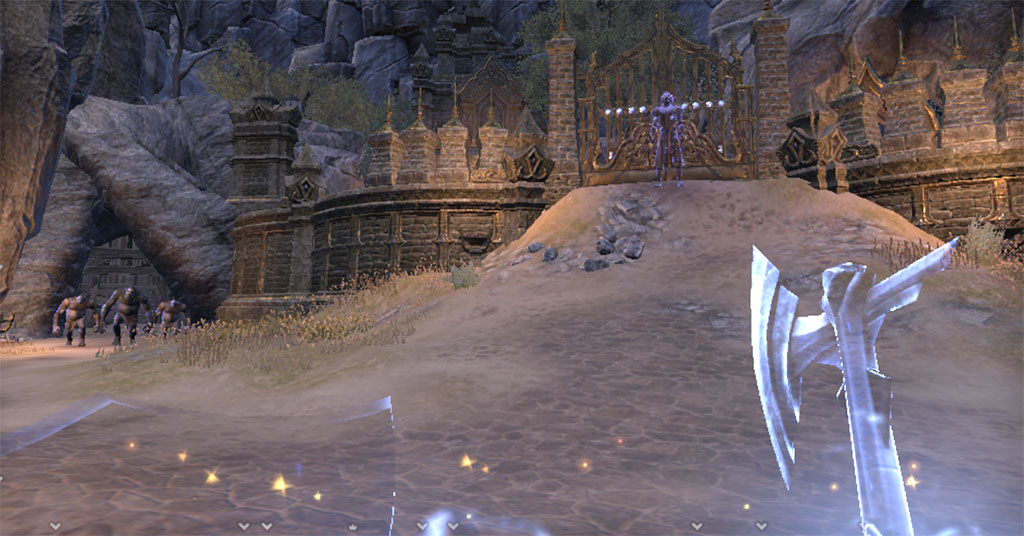
To access the Maw of Lork’haj, you must either travel to Reaper’s March and walk in the gates, or take a boat from Abah’s Landing. Once you have discovered the local wayshrine, you can port into the trial via the Reaper’s March map directly. As with the other trials in ESO, there is an area with services to help you out, so you can sell, repair, and even craft on the spot. You will want two tanks for this trial, both for many of the general group pulls and for one of the bosses.
Once you walk through that first door, however, something is different. No enemies or traps spring forth to ruin your day. Just an empty hallway, leading to another door. This doesn’t mean you have just entered the easiest trial ever. Instead, it just means this hallway is empty.
Moving on to the First Boss:
In the next room, you face your first pull of the trial. There are several noteworthy aspects to the general mobs in this trial, so I shall address those first.
Mixed Khajit (bent):
- Sun-Eaters: These are mage types that put down an area of effect which silences and pulls you in. If you are pulled to the center it does heavy if not lethal damage. They also attack with a multi-shot void strike, which includes a stamina drain if you are hit. Priority kill these!
- Dreadstalkers: Archers which summon a cat. Kill them as second priority. The cats will disappear. Cats will attack a person with a pillar of dark energy on them.
- Savage: A two-handed maul user, which breaks armor. Kill them as a low priority.
- Shadowguard: A tank type which should be last on the kill order. Watch their melee range aoe. They dash away and stun as well.
- Miscellaneous bent Khajit: A bunch of weak things that die in area of effect damage and need not be focused. They can be mostly untanked, but grabbing some will help the healers be happy!
Ogres:
- Shaman: A mixed caster/melee mob which has an area effect attack with knockback. Priority kill.
- Flesh Render: A strong melee mob which can deal heavy damage when not blocked. Low priority.
- Brutes: A weak mob which should die due to area of effect attacks prior to the other mobs dying. They do some damage, so should still be grabbed by tanks.
To start, you will be facing only bent dance Khajiti until after the first boss. Simply defeat each group, remembering your kill order, and keeping everything well under control. There should be three groups prior to the boss, and if they take a very long time to die, it is a good indicator your dps needs improvement.
Zhaj’hassa the Forgotten:
The room where you fight the first boss has six pads on the ground spread around. The group should position themselves around the outside of the room, with two people to each pad, and try to return to those pads only. Additionally, group members need to stay spread slightly for some of the mechanics.
- Curse of the Bent Dance: Zhaj’hassa will select three players, and fling blue orbs into the air to land on them. There is no avoiding the curse. Worse, if you are too close to a cursed player for two seconds after the curse takes effect, you will be cursed as well. Thus why the group needs to maintain a small distance from each other.
- Dark Crystal Pillars: Zhaj’hassa will select a player and attack them with a pillar summoning spell. The pillar will have a double red circle effect, and will knock aside the player as well as causing damage. You may move swiftly out of the area, or block to minimize the harm and stop the knockdown effect. The number of pillars slowly decreases throughout the fight.
- Channel the Void: Zhaj’hassa will use an ability which kills any player who does not get out of his line of sight. You have a short time to hide, and the only place to hide is behind a pillar. This means that pillars need to be kept inside the ring of pads on the outside if at all possible. Since the pillars are randomly assigned to targets they can cluster together. Watch for his emote, and for him to glow dark blue.
- Summon cats: Once again, cats will come out. This time, however, they should be killed. They do significant damage and the only way to get rid of them other than killing the boss is killing them. You can root them. You can use chains to pull them.
- Void balls: Each time a curse is cleansed a void ball is spawned. They move around the room giving you a stackable damage over time effect that eats away at your health. Avoid them if possible, but a few stacks is not a big deal.
- Shield of the Void: Zhaj’hassa shields himself. He then hits every player with an area of effect attack. Standing too close together can cause you to take multiple hits. Burn the shield before your group dies, and he will return to his normal attacks.
- Cleave: The boss cleaves in front of himself, so watch when he is moving.
- Shatter armor: The boss can shatter the tank’s armor, leaving them taking far more damage for a few seconds.
Descent to a Big Battle:
From this point on, you will face a sloping descent into a large area. There will be a number of groups to fight on the way. Once down in the big area there will be a large battle against a number of groups of foes, both bent dance Khajit and Ogres. The battle will last until you beat enough waves or you fall. Should you succeed you shall be rewarded with a chest of treasures at the gates above you. As long as you keep your tanks topped off on stamina and follow the standard kill priority you should be fine here. It just takes some time.

S’kinrai and Vashai, The Wonder Color Twins:
This fight is really a matter of making your team split into two groups. Controlling who is selected as what color is important to manage, and there are a few strategies. Inevitably, however, somebody seems to die or get the wrong color after a few runs. This is also something I address. Ensure each group has a tank, a healer, and a fairly even mix of the dps. Ideally the two will die at the same time. Additionally, unless you have the wrong color you will stay on your half of the room, which should be split in two by an imaginary line between the two doors. Notice the candle line in the middle of the room, as it is important.
Color assignment: When starting the fight and after each teleport, the boss you are attacking will assign you their color. Being in closer proximity to that boss than the other also seems to help. Staying slightly spread out is advised so that a wrong color may be adjusted. Carefully adjust if you have the wrong color. Otherwise everyone may collapse together in a group. For those with the dark color, stack on the behind of where the tank will fight the soon to come over S’kinrai. For those with the golden aura, stacking at a spot where the tank will not fight Vashai is ideal (this makes ranged damage ideal for this fight.) If two people with opposite auras are close together they will both take heavy damage every second or two, which is usually fatal.
Color restriction: Once you have a color you deal vastly reduced damage to the boss who has that same color. Thus the groups will want to attack the other boss. The two tanks should use the Undaunted taunt at range to swap bosses.
Both bosses summon miniature versions of themselves. The same rules apply and these extra versions should be priority to kill.
S’kinrai and miniatures will channel a beam attack on a player. Interrupt it, ideally with bash as ranged interrupt effects have a cooldown time.
Vashai will drop a void zone which silences like the Sun Eaters. His miniatures will use the Sun Eater’s multi-void attack and drain stamina with it.
After a given amount of time, the twins will teleport to the doors. Which one is in front of which door is random. The room will be split along the candle line with colors, each side matching the boss on that side. Make sure you stand on the side that does not match your color or you will blow up. As a side effect of the port, the group must retarget the desired boss. There are two methods here:
Original color method: Using the original color method, you always target the far side door. You will always, ideally, be the same color and look for the same boss and miniatures. The downsides to this method are less practice of aura awareness and a slightly longer time to reacquire.
Set door method: Using this method, you look at one of the two doors, entry or exit. Your group will all target the boss at that door each and every time to pick up their color. Your color may change through the fight, requiring you to note it for miniatures, but the bosses will still be tank swapped making that a non-issue (you do want two spots assigned for ranged dps on Vashai.) The downside to this method is that it takes more personal awareness of your color aura when it wouldn’t otherwise matter (but it makes noting that you are the wrong color and dealing with it much easier in turn.)
Once one of the two dies, all colors disappear. The next teleport will devastate the raid, so finish the remaining boss quickly.
The Second Gates:
This is another event similar to the mass group fight earlier on, except this one is a little less hectic. First you will see a handful of the ignorable bent Khajit and two very big cats. Group together, remembering that the cats cannot be taunted, and burn them hard. Stick to single target rotations, but enjoy any splash area effect damage benefits you have!
Once they are down, there are two ramps. At the top of each is a chain to pull which starts that side of the event. Each side features three waves of the bigger bent Khajiti to kill. Unless you have had issues with them before, and you likely wouldn’t be this far if you had such issues, they should be a non-issue to defeat. Pull each side in turn via the chains, and collect another treasure chest reward.

Rakk’hat, The Shadow Realm, and the End of the Bent Dance:
Finally you have reached the innermost sanctum. It is time to end the bent dance, at least for this visit! Before you do so, however, you will have to overcome this daedric fiend’s tricks. Note that there are four pads at the corners of the room, and what looks like a clock with rings at each hour position around a big central ring. One tank is enough here, so use the other to help in the shadow realm!
Void smash: Rakk’hat teleports above one of the platforms and smashes it, covering it in void energy. This will happen right away to the central ring, then follow the order around the clock, going clockwise. Stepping into the void energy is deadly.
Blessing of Protection: one player can stand on the next ring to be smashed and will gain some damage mitigation. Ideally this should be the tank.
Void machine gun: a spray of void energy which will damage all players in the frontal cone. The tank needs to turn Rakk’hat away from the group.
Hulk: Rakk’hat will summon a Hulk add. The hulks should come at one, four, seven, and ten o’clock.
Void balls: Void balls rocket across the room from a pad, once again putting a damage over time effect on those hit.
Death and cats: When a player dies, Rakk’hat will start summoning cats from their corpse. Get them up quickly or the cats will make the fight much more difficult.
Aerial void bombardment: Rakk’hat selects a few players and throws void bombs at them. Keep moving to minimize damage, and heal the damage as needed. Those being bombed should stay away from other group members.
Bent Dance: Rakk’hat will feed off the Khajiti performing the bent dance! Six void callers spawn in the shadow realm, and your group will need players to go deal with them. This will happen shortly after the Hulk add three at one, four, and seven o’clock. You have limited time to deal with them, and the faster the better! To win, you must use a synergy called ‘Eyes of Jode’ at braziers with a blue flame along three paths. At each brazier you may or may not see a void caller revealed. If one is revealed, kill it with an instant attack (they have 1 hp) and keep going. Once two are dead on a path, that path is done… so move to another path! Beware, though, as a the left and central paths intertwine near the end. There are once again two strategies, one of which is my own creation!
- The first strategy is to have three or four people assigned to head back and maximize the speed of clearing the shadow realm. This strategy uses your lowest dps members. The goal is to have everything over in a very short time, bring all the people out, and keep dpsing more. If you don’t do this quickly, however, you lose a lot of dps.
- Jairone’s strategy: Using a sorcerer with the bolt skill or a morph who is able to spin and move through the area rapidly, you rely on two players (that sorc and the second tank in dps gear) to clear the shadow realm. This allows you to keep more dps members on the boss while the shadow realm is being cleared, and is most likely the more effective strategy overall. The weakness is that it requires a specific build and a solid player to execute that build. Having an off night can leave the team to wipe over and over again.
- When exiting the shadow realm with a victory, you get 20 seconds of 1.5x damage. Focus fire your biggest hitters and refresh damage over time effects just prior to this ending to maximize shadow realm group contribution, then go cleanse on a pad. If you do not cleanse you will die upon trying to enter the shadow realm again!
When Rakk’hat is at the eleven o’clock position there are two possible results.
Rakk’hat will go into his enrage mode, dealing raid wide damage until defeated. This is the easier result, requiring only that the raid group up for healing and defeat him prior to the healers running out of resources.
>15% health:
Rakk’hat will turn the center ring golden. The group gathers in a spread out formation at the center ring. Off heal capable people should be ready to help heal as needed.
- Void curse: The player takes damage every second. Affected players may not cast any spells. Use ranged light weapon attacks if possible on the summoned bent Khajiti at the clock position rings, and gather close to the center of the big ring. Healers and off healers not affected should heal them!
- Cauterize: This synergy is available to those who are not hit with void curse. All non healers will use this asap if not cursed to attack and try to kill the summoned Khajiti using the priority kill assignments as before. Once the channel has stopped, they will then attack with spells and weapons.
Healers and off healers should communicate who is not affected. They should then split into two groups, channeling and healing in turn. As it is impossible to predict who will be cursed, this must be adjusted on the fly!
After a certain amount of time, Rakk’hat will fly up to use void smash on the center ring, returning the fight to the original configuration, but with the extra Khajiti up. Rakk’hat does not heal, but the fight is much tougher for a while with those Khajiti. Defeating them and restoring order needs to be done asap to proceed, and in most cases the dps simply will not be strong enough to avoid a wipe if you get to this point in normal mode (you would have had Rakk’hat dead or under 15%.) The entirety of the other mechanics are still in play, including people going back to the shadow realm… meaning ideally that the extra foes need to die prior to the two o’clock position.
Once Rakk’hat is defeated the sanctum will be restored and the corrupt effects of the bent dance defeated. Claim your rewards, and congratulate your group on a job well done!
As always, thank you very much to those who gathered together to run trials, and especially to Prissy for leading the events! Without all of you these guides would not exist!
About the Author
Jairone
Senior Editor
Robert joined Gaiscioch during the Rift chapter, and decided to stick around because the people are awesome! He has a long history of playing games, mostly RPG or Strategy, and has played MMOs since they were born of MUDs.
Aside from his gaming, he also enjoys reading and cooking. Robert has also been previously published as a contributor with Rift Junkies for several articles during the 'Storm Legion' expansion. He does not always use the moniker 'Jairone' but it is a frequent choice in honor of one of his Grandfathers, as it is based on his middle name of Jerome.
About Elder Scrolls Online
Experience an ever-expanding story across all of Tamriel in The Elder Scrolls Online, an award-winning online RPG. Explore a rich, living world with friends or embark upon a solo adventure. Enjoy complete control over how your character looks and plays, from the weapons you wield to the skills you learn – the choices you make will shape your destiny. Welcome to a world without limits.