
Acquiring Your Legendary Weapon in GW2
I’ve always loved to try the crafting systems in any game I play. Guild Wars 2 has a system that I enjoy immensely, even if I don’t have all of them at maximum level. They are getting closer as I use each for various parts and pieces for ascended and legendary crafting.
Some people will look at the requirements for legendary crafting in this game and cry. If you do it from scratch it will take a lot of work, time and gold. However, in the end you can say, “I made that!” Legendaries also have their own cool skins so people know you’re the proud owner of one.
One huge plus I had was a great guild of helpful people. We have a mentality of wanting to help each other complete and acquire things available in the game, no matter how small or large. ArenaNet did an awesome job making this game social and easy for people to help others.
This article is a combination of a guide and my experiences completing Rodgort and working my way through phases of Meteorlogicus.
Where to Start
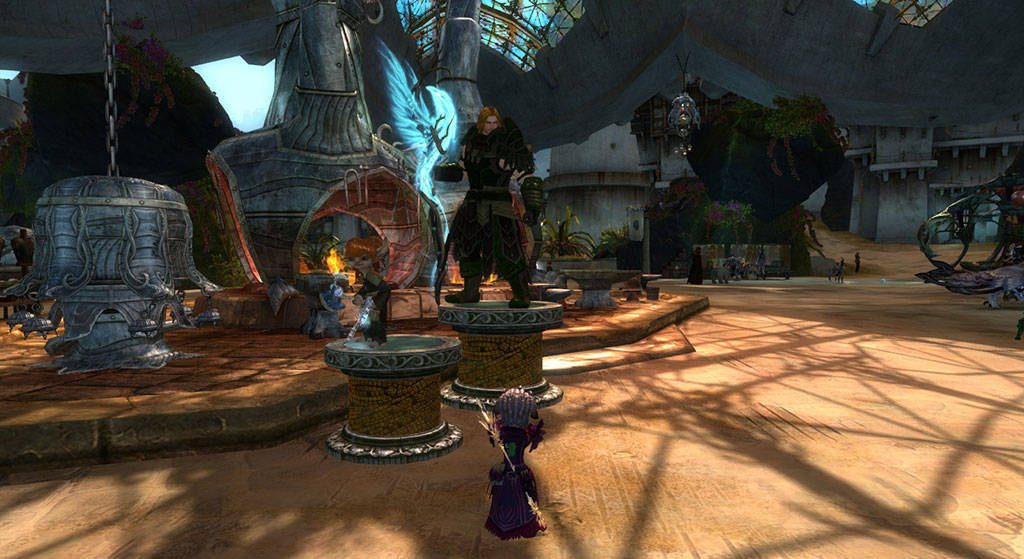
To start crafting any legendary weapon you must first buy the access to it at 5 gold and 10,003 karma for each one. They are for sale by Grandmaster Craftsman Hobbs, found in the center of the Lions Arch crafting area. He is the Norn in the picture.
You will also have to have Revered Antiquarian mastery completed, which is the first one under Central Tyria - Legendary Crafting.
With the help of a guildie that inspired me to this crazy adventure - as if I didn’t have enough to do in this game already after a hiatus - I unlocked the requirements for all of the legendaries. Why? So just playing the game could lead to fulfilling the first phase of them all from the get go. This made sense to me, and I have quite a few items on all legendaries, since I do about everything in the game except PvP and raiding. I will note you should have a bank tab dedicated to this so you can throw them in there and then sort when you need to because you don’t need to save them all. For instance, any items that say they are for a collection only, once verified as acquired in the collection, can be sold to save inventory space.
My primary focus stayed on Rodgort since I didn’t win it in our Great Tyrian Adventure raffle, and it looked cool when my friend showed it off. I definitely was not going to pay someone else for having the fun of making it either. The second on the list was Meteorlogicus.
A good tool to use is the wiki at https://wiki.guildwars2.com/wiki/Main_Page because most of the legendaries have been around quite some time and the information in there is pretty good for each phase, from the precursor to the final production steps. Just put the legendary name and phase you are on in the search box and check out what you need to do.
Phase 1 - Creating the Experimental Version
Phase 1 for any legendary will have a list of things to do and collect. To help you track this in the game you can go into your achievement panel and under collections there is a section for Legendary Weapons. Any that you have bought access to will show up here.
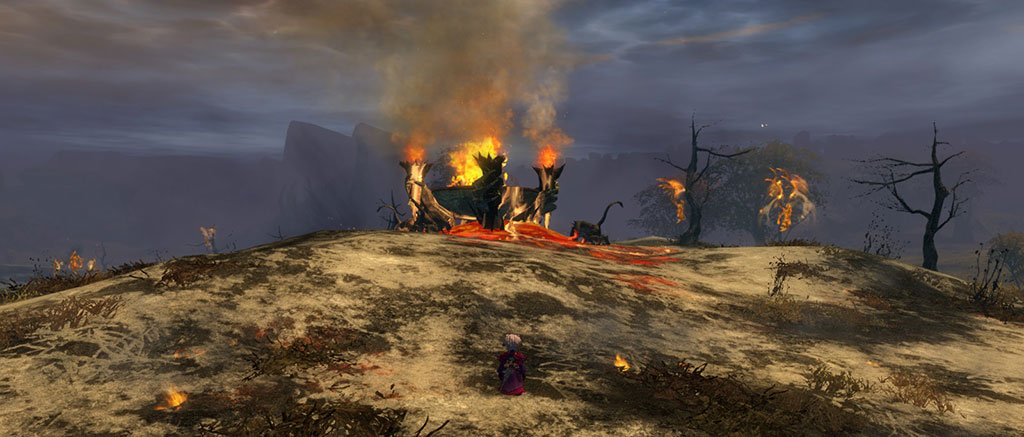
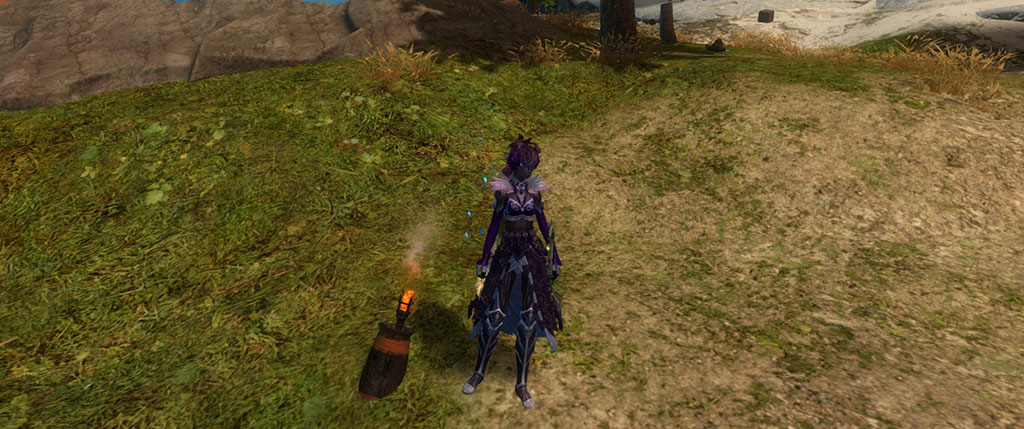
For Rodgort you will burn several acquired items in Fireheart Rise at Division Shrine, in the cauldron. Appropriate for a weapon that will eventually look like a minotaur's head that breathes fire and lights up a portion of your arm in fire when wielded.
The following list shows the eleven things you must do for Rodgort’s Phase 1:
- Burn a heart of a Flame Effigy
- Burn a heart of an Ember
- Burn a heart of a Fire Imp
- Burn a heart of a Fire Elemental
- Burn a heart of a Destroyer
- Burn an Essence of Fire Magic
- Burn Tequatl’s Eye
- Burn a claw of Jormag’s Scale
- Burn the Shatterer’s Crystal
- Burn the Vinewrath’s Petals
- Burn a heart of the Megadestroyer
The first five hearts simply drop from creatures of that name you can find around the world. It may not drop on the first one, but I never had to take more than ten or fifteen minutes in an area where they spawned in good numbers. Just watch for the heart to appear in your inventory.
The Essence of Fire Magic is like the first five, but you have to kill the Flame Legion to acquire this item. Its name is the only one on this list that doesn’t tell you directly what mob to kill for it, but the tool tip tells you.
Tequatl, Jormag, and Shatterer are all world bosses on a timer. Once you have completed the events that destroy them, you will acquire the item to burn in the cauldron. Good luck on getting to these events. I use the event timer at http://gw2timer.com/?page=Chains to determine when these fall into my play time.
The Vinewrath is killed at the end of the huge meta chain event in the Silverwastes and the Megadestroyer is at the end of the meta chain The Battle for Mount Maelstrom, that starts on the south side of the volcano in Mount Maelstrom.
Once all eleven items are acquired and burned, you will gain the achievement for completing this collection and can return to Hobbs in Lion’s Arch to acquire your Chest of the Bonfire. This contains Essence of Bonfire and Box of Recipes for Rodgort’s Flame (First Tier). You will make Rodgort’s Flame Experiment with these. Any character can open the box and add the recipes to the account. However, you must have a Huntsman who is at least level 450 in order to complete it.
The recipes for any legendary, including its early phases, will show up under a section called Legendary Component. All the crafting steps in Phase 1 through 3 of Rodgort will be completed by the Huntsman at the Huntsman crafting station.
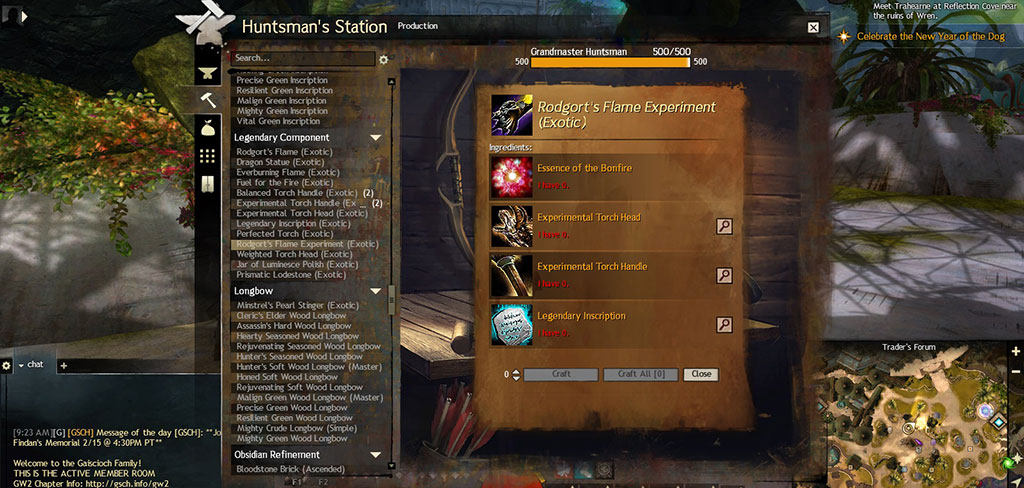
The following is the summary of ingredients you will need to make Rodgort’s Flame Experiment. You already have the Essence of Bonfire acquired with the recipes, but the following will have to be made by the Huntsman:
- Experimental Torch Head
- 2 Deldrimor Steel Ingots
- 50 Memories of Battle
- 50 Shards of Glory
- Experimental Torch Handle
- 2 Spiritwood Planks
- 50 Memories of Battle
- 50 Shards of Glory
- Legendary Inscription
- 10 Globs of Ectoplasm
- 5 Piles of Crystalline Dust
- 1 Orichalcum Plated Dowel
- 10 Elonian Leather Squares
I list these because the ascended pieces will take some time to make if you are not properly prepped or not into a lot of ascended crafting yet. I find the leather is the hardest to acquire of all the ascended materials with cloth (not required here) at a close second. Wood and ore are just a matter of running around harvesting every node you see and using up some time to do so.
The pieces that might seem worse to some are the Memories of Battle and Shards of Glory. If you don’t WvW or PvP, you won’t gain any of these. You can buy them from the Trading Post. The Shards of Glory sell pretty cheap at 45 copper or so, but the Memories of Battle are usually in the 6 silver and change range as of this writing. I love WvW and you can even find streams of Gaiscioch out on the battlefield, so I had those covered. I had to buy the PvP related ones because I don’t take time to do that often.
Once you have crafted Rodgort’s Flame Experiment and have completed Magister of Legends, second mastery track under Central Tyria - Legendary Crafting, you can visit Hobbs to buy Rodgort Vol.2 for 5 Spirit Shards and 10,003 Karma. Once you have this you will be onto Phase 2 of Rodgort.
I got lucky with timing for the boss fights and meta events making it possible to complete in just a few days. Don’t give up yet if this is not the case for you. The journey is a long one, but worth the effort for anyone that loves crafting unique things like this.
I also have Meteorlogicus Phase 1 completed. Like Rodgort, there were plenty of things to acquire in many places around the world. However, Meteorlogicus requires far more ascended materials than Rodgort did. In Phase 1 I used 25 Spiritwood Planks, while Rodgort only required 5.
Phase 2 - The Perfected Weapon
You will already have two pieces of this twelve set collection - Rodgort’s Experimental Flame and Rodgort Vol. 2. Four of the remaining items are crafting related, six of them require a collection of various things found in the world.
You will need to talk to the master craftsman of the appropriate trade that makes the weapon, which is the NPC standing next to the crafting station that you buy items and recipes from. In the case of Rodgort, it is the Master Huntsman. The other thing you will realize at this point is that you will need to be maxed at 500 in the respective crafting to complete what the master wants you to make for two of the four crafting steps. These are as follows:
- Torch Heads
- 5 Bronze
- 5 Iron
- 5 Steel
- 5 Darksteel
- 5 Mithril
- 5 Orichalcum
- 1 Deldrimor Steel (requires 500 in crafting)
- Torch Handles
- 5 Green
- 5 Soft
- 5 Seasoned
- 5 Hard
- 5 Elder
- 1 Spiritwood (requires 500 in crafting)
Most Legendaries will follow the same pattern, though they may have different requirements. For instance, Meteorlogicus and Rodgort need the same materials from Green through Elder, but Meteorlogicus requires 3 scepter cores and 3 scepter handles for the 500 crafter (ascended) component instead of only one.
Once you have completed these items, talk to the Master to hand them in. You do not have to hand both in at the same time, but will not advance to the next part of the crafting for this phase until both are handed in. Once you do, you will be able to make the following:
- Weighted Torch Head
- 250 Mithril Ingots
- 5 Deldrimor Steel Ingots
- 10 Lumps of Primordium (buy from master craftsman)
- 10 Thermocatalytic Reagents (buy from master craftsman)
- Balanced Torch Handle
- 250 Elder Wood Planks
- 100 Mithril Ingots
- 5 Spiritwood Planks
Talk to the Master Craftsman to prove you made these two items. The two items for Meteorlogicus in this phase require a bit less materials, giving you a bit of a breather on that one.
There are six things that Mossi will want for Rodgort, and she will ask for them in the order of the following list. Once you fill a requirement she will tell you what to acquire next.
- Desert Magics: Torche Edition - 1000 Bandit Crests
- Jungle Magics: Torch Edition - 400 Geodes (Dry Top Currency)
- Old World Magics: Torch Edition - 100 Obsidian Shards
- Ancient Water Magics: Torch Edition - 100 Karka Shells
- Herbal Magics: Torch Edition - 25 Passion Flowers (from blooming Passiflora plants)
- Stabilizing Magics: Torch Edition - 25 Stabilizing Matrices (Fractal drop)
You should have gained Expertise In Torch Crafting after completing all of this. I found Meteorlogicus the same as Rodgort for Mossi, except she did not want the Passion Flowers.
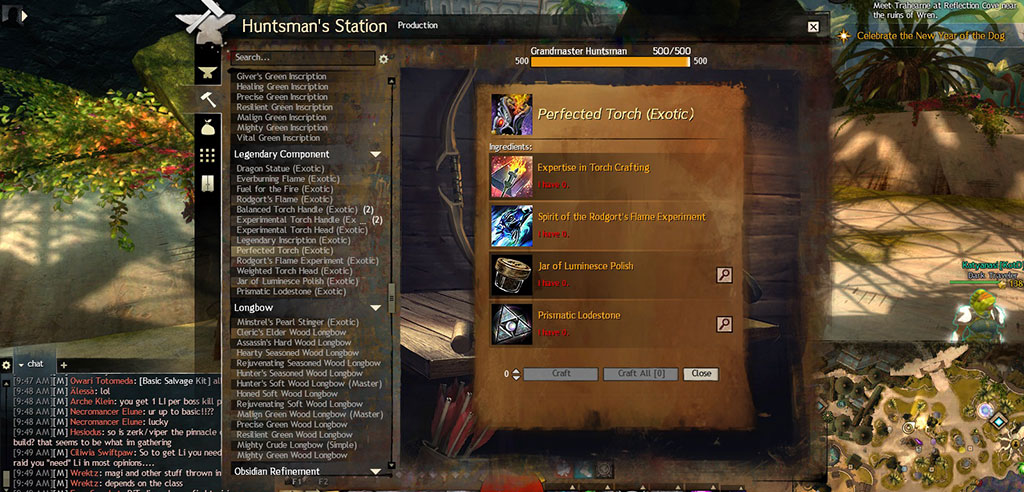
To acquire the Spirit of Rodgort’s Flame Experiment you need to salvage Rodgort’s Flame Experiment you made in Phase 1. Sounds scary, but you can salvage it now so you can move on with this adventure. The other two items required for the crafting of the Perfected Torch are listed in the Huntsman’s Legendary Component section. The recipe for the Perfected Torch is as follows with the break down of the crafted item ingredients:
- Experience of Torch Crafting
- Spirit of Rodgort’s Flame Experiment
- Jar of Luminesce Polish
- 250 Piles of Bloodstone Dust
- 1 Amalgamated Gemstone
- 10 Thermocatalytic Reagents
- 10 Master Maintenance Oils
- Each takes 20 Jugs of Water and 3 Piles of Crystalline Dust
- Prismatic Lodestone
- 1 Glacial Lodestone
- 1 Molten Lodestone
- 1 Onyx Lodestone
- 1 Charged Lodestone
You have now successfully made your Perfected Torch and can go talk to Hobbs to buy Rodgort Vol. 3.
This phase is very similar for all legendaries, though there will be some differences in what Fossi wants you to collect and some differences in the number of things the Master Craftsman may require. For the final crafting phase most will use a salvaged item from the experiment you crafted, the appropriate expertise training acquired working through this collection phase, the Jar of Luminesce Polish and the Prismatic Lodestone.
Phase 3 - Creating the Precursor
To complete the third collection you will be doing a lot of running around accomplishing tasks. This takes time rather than materials to complete. The only materials required are for the final crafting of the precursor after you have accomplished all of the items for the phase 3 collection.
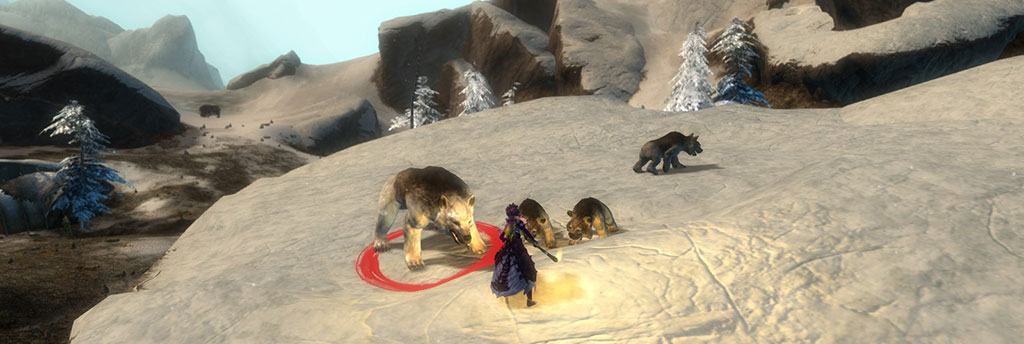
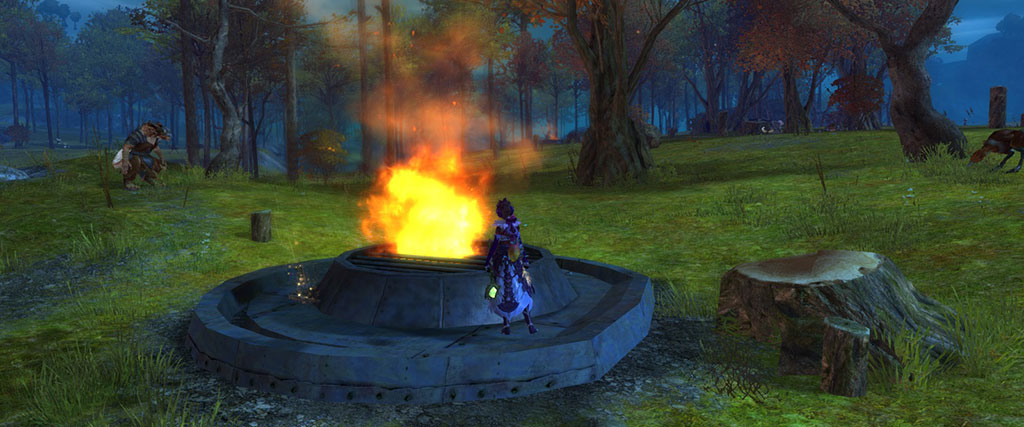
Rodgort has 31 items, two of which you have already, due to crafting the Perfected Torch and buying Rodgort Vol. 3 from Hobbs. I enjoyed the first twenty on this list because I had to go kill things with a torch. The great thing is that you keep the torch when you waypoint in the zone or hop on a mount to get somewhere faster. If you leave the zone, enter the water, or do a transformation, you lose the torch and have to return to get another one. The following picture is an example of the torches you can interact with at the grawl village in Frostgorge Sound.
The following is the list of things to burn with a torch you pick up and wield, organized by zone. All of them must be veterans to count and killed while wielding the torch. Like any collection you can do these in any order you like.
- Frostgorge Sound starting at the grawl village near Safewatch Vale
- Burn a Pinesoul - west of grawl village
- Burn a Longhorn Sheep - due north of Ridgerock Camp Waypoint
- Burn an Eagle Griffon - northwest of grawl village
- Burn an Arctodus - north of grawl village
- Burn an Alpine Stalker - northwest of Ridgerock Camp Waypoint
- Fireheart Rise starting at the grawl village called Tarstar in the southwest
- Burn a Moose - southwest of Icespear’s Waypoint
- Burn an Oakheart - in the woods north of Apostate Waypoint
- Burn a Black Bear - in the woods north of Apostate Waypoint
- Burn a Marmax - on top of the hill northeast of Atrox Castrum
- Burn a Tar Elemental - southwest of Breaktooth’s Waypoint
- Harathi Hinterlands take a torch from campfire in Blackhold Mine Camp
NOTE: Burn some centaur supplies at the camp to save returning later
- Burn an Eagle Griffon - southwest of Grey Gritta’s Waypoint
- Burn a Freshwater Crab - on the shore west of Grey Gritta’s Waypoint
- Burn an Eagle Raptor - east of Blackhold Mine Camp
- Burn a Bear - on a hill northwest of Barricade Camp Waypoint
- Burn a Longhorn Sheep - south of Demetra Waypoint
- Mount Maelstrom take a torch from campfire at Firebreak Fort Waypoint
- Burn a Firefly - around Murkvale Waypoint
- Burn a Pink Moa - at the pond west of Mosstide Walfts
- Burn a Mossheart - in forest southwest of Spaecia Illogica Waypoint
- Burn a Hermit Crab - on a tiny rock in the water south of Zone Blue
- Burn a Jungle Spider - found in Gauntlet Gulch
The rest are based upon lighting fires in various locations around the world. Some are part of chain events while others are pretty quick. There are nine of these and they can be done in any order.
Even if you don’t do fractals, the first on the list is easy to do. Enter the portal for the fractals in southern Lion’s Arch. At the console to the left of where you zone in, pick Snowblind and set it at level 1. Hop into the big blue magical looking pool below where the console is. You are now in the Snowblind fractal. All you need to do is run to the first bonfire, use the special action key and light it. As soon as you have credit you may exit the fractal.
Drawing the Enemy is at the end of a chain event. The good thing is that it restarts regularly if it fails. This event begins at the Wreckage of Doomspy in Fields of Ruin. This chain messed me up more than once. If no event is going on, check to see if Vanguard Lockwood is standing on the north side of the camp. If she is not there either the defense failed, the escort failed, or the final event is in progress or just ended to the north (this is the least likely). This chain event progresses as follows:
- Camp Defense
- Wait a minute or so and then after a conversation an NPC runs south - follow him
- Escort event from the secure fort to the south back to the camp - it takes a bit
- A trebuchet is built and you will need to defend as this happens
- Finally Vanguard Lockheed moves to the north side of the camp and waits
- Several minutes later Sentinel Glasscutter and Sentinel Glassedge arrive from the north
- Follow them north to the site of the final event in this chain. You light one fire, do some fighting, then light another to go through four bonfires total.
I received the credit after this long event chain but due to missing the NPC running south, had to wait to try again to see what I had missed. The Wiki is not overly fleshed out for this one, hence, my long explanation for it here.
The third, Draw the Pack, is at the hero challenge for the Marmox Packleader along the eastern border of Blazeridge Steppes. As soon as you interact with the fire to start the hero challenge you will get the credit.
For the Cleansing Fire you will go to Bloodsaw Mill in Diessa Plateau and use the fire pit in the heart area. You will be burning 10 Elder Wood Logs there. Once you have tossed them in the fire you have credit.
You need to use a torch to burn one pile of the centaur supplies for credit. Do this with the killing of mobs with a torch in Harathi Hinterlands, since it is the same camp you get the torch from. I noted this with that list above as well, to be sure you save some time if following my guide in order.
For Hylek Protection, you can interact with any of the signal fires at Southwatch Post south of Zintl Holy Grounds Waypoint in Sparkfly Fen.
To Burn Away Bad Neighbors, travel to Joy’s End south of Watchful Source Waypoint in Brisban Wildlands. Interact with the brambles to set them on fire to complete this.
Light the Signal Fires is done in the Silverwastes, once any of the forts are at a stage to have them active during what everyone calls the RIBA phase of the maps META event. Once you light one you will be credited for this in the collection.
The final one on the list is really easy. Travel to Slieve’s Inlet southeast of Slieve’s Waypoint in Caledon Forest and interact with one of the Risen Corpses. Once it lights on fire you will gain credit for this.
Now you have travelled the world and completed the phase 3 collection of Rodgort. You can now acquire the Chest of Burning which contains the recipes to make Rodgort’s Flame, the precursor. You will also acquire Essence of Burning used in the recipe.

The four main elements of Rodgort’s Flame are:
- Essence of Burning
- Spirit of the Perfected Torch
- Everburning Flame
- Dragon Statue
You will need to salvage the Perfected Torch to acquire the Spirit of the Perfected Torch. This is a trend for most legendaries to work through the phases to the final precursor.
You will need a Heart of Fire. These are not at a bad price on the trading post at the time of writing, but you can get one yourself if you so desire. Go to southern Mount Maelstrom and off the main volcano channel there is a chamber with a Veteran Fire Imp that will drop this item. You will also need a Tar Elemental Core and this you have to go kill tar elementals for. You cannot buy it. Both of these will go into the Everburning Flame you have to make.
The Everburning Flame will require the following to be completed by the Huntsman:
- Fuel for the Fire
- 1 Tar Elemental Core
- 30 Elder Wood Planks
- 5 Mystic Crystals
- 1 Spirit Wood Plank
- 5 Molten Lodestones
- 1 Mystic Crystal
- 1 Heart of Fire
The Dragon Statue requires the following to be completed by the Huntsman:
- 1 Deldrimor Steel Ingot
- 250 Mithril Ingots
- 50 Orichalcum Ingots
- 10 Thermocatalytic Reagents
Now you have completed Rodgort’s Flame, a precursor. It may seem like a lot, but I really enjoyed the journey to get here. This part actually took less time than the crafting of the legendary due to the sheer amount of materials needed to create the legendary out of the precursor. You always have the option of buying the precursor if you don’t feel like running through this part of the journey.
Creating Your Legendary
This part will take less writing to list everything, but definitely took me longer to acquire all the materials in order to complete it. Most everything is combined in the Mystic Forge and will be noted otherwise if it is not.
The final four ingredients are:
- Rodgort’s Flame
- Gift of Rodgort
- Gift of Fortune
- Gift of Mastery
The Gifts are what really hurt in the quantity of ingredients required and I found the Gift of Fortune the hardest. Each Gift’s recipe will be listed and include sublists for its ingredients.
Gift of Rodgort
- 1 Gift of Wood (Hunstman crafts)
- 250 Seasoned Planks
- 250 Hard Wood Planks
- 250 Elder Wood Planks
- 250 Ancient Wood Planks
- 1 Vial of Liquid Flame (Chef crafts)
- 250 Ghost Peppers
- 1 Gift of Baelfire (buy with 500 Citadel of Flame dungeon currency)
- 100 Molten Lodestone
- 100 Destroyer Lodestone
- 100 Icy Runestone (Buy for 1g each after Claw of Jormag event in Frostgorge Sound)
- 1 Superior Sigil of Fire (this is cheap so I bought it on the Trading Post)
Other than the Lodestones, Ghost Peppers and forking out the cost for the Icy Runestones, this one was not that bad. Thankfully a friend gave me most of the Ghost Peppers. I still owe her a spicy meal.
Gift of Fortune
- 77 Mystic Clovers (see note after the list)
- 250 Globs of Ectoplasm
- 1 Gift of Might
- 250 Vicious Fangs
- 250 Armored Scales
- 250 Vicious Claws
- 250 Ancient Bone
- 1 Gift of Magic
- 250 Vials of Powerful Blood
- 250 Powerful Venom Sacs
- 250 Elaborate Totems
- 250 Piles of Crystalline Dust
Mystic clovers can be acquired a few ways. One of them is through reward tracks you do in WvW or PvP. There are ways to buy them, with one option being with Fractal Currencies. Another way is to make them in the Mystic Forge with the option of two recipes:
- Makes 1 Mystic Clover
- 1 Obsidian Shard
- 1 Mystic Coin
- 1 Ectoplasm
- 6 Philosopher Stones
- Makes 10 Mystic Clovers
- 10 Obsidian Shards
- 10 Mystic coins
- 10 Ectoplasm
- 10 Mystic Crystals
NOTE: You can acquire other items out of the Mystic Forge with these recipes.
Gift of Mastery
- 1 Bloodstone Shard (buy from Miyani)
- 250 Obsidian Shards
- 1 Gift of Exploration (obtained by any character that acquires World Completion)
- 1 Gift of Battle (obtained by the Gift of Battle reward track in WvW)
I found this part the least exciting to accomplish since I did not have little missions around the world to direct me to them like the phases in the precursor. This took time just playing the game, buying some of the items to speed up the process, having some help of my friends, and figuring out the best places to farm. Thankfully, Gaiscioch has plenty of events going on that helped me reach the end of the journey.
Of course, I have to repeat the Gift of Fortune, Gift of Mastery and need another 100 Icy Runestones all over again for Meteorlogicus when I get to the final creation process. Thankfully it is taking a bit longer in the precursor process so I can work on building my materials back up. It might take some work for those 100 Charged Lodestones, but at least I didn’t have to use those on Rodgort and it is only one Lodestone type, not two. The other fun part of Meteorlogicus is the requirement of quite a bit of dust for the Gift of Energy.
Conclusion
Making a legendary weapon appears daunting, but it is not a race. Take your time and enjoy the journey. Not everyone has the same amount of playtime, resources, or friend network to help with the task. However, no matter what, the accomplishment will outweigh all the blood, sweat, and tears put into it. I suggest you try making one from scratch if you really enjoy crafting, collecting and challenges.
About the Author

Briseadh
Senior Editor
Althea joined Gaiscioch back in October of 2009 and has been here ever since with only a few month hiatus between Warhammer and Rift. As soon as she knew they were in Rift, she jumped ship to Faeblight and has followed them onward through every chapter since with a few side games thrown in for spice.
She has been an avid player of RPG style games since 1980 when she first played Dungeons and Dragons. Since then she has created her own tabletop gaming world used with various rule sets as D&D progressed. Once she could get online she played MUDs. Her MMO days started with Everquest and have moved through over a dozen games with some lasting only a month's time in her life and others going for years. She has tested several games from the perspective of a disabled gamer with hand issues due to her multiple sclerosis.
When not writing about or playing games, she can be found writing novels, reading and doing various art projects. She also writes items based on her faith and is working on publishing a novel. She also does editing for a gaming developer.
About Guild Wars 2
Guild Wars 2 is an online role-playing game with fast-paced action combat, a rich and detailed universe of stories, awe-inspiring landscapes to explore, two challenging player vs. player modes—and no subscription fees!