
Adventures in The Silverwastes
Guild Wars 2 has perhaps the best ‘pick-up’ open world PVE of any MMO. The game is designed to reward cooperation and—sure enough—complete strangers flock together to conquer zones all over the world.
At level 80, one of the best places to do this is The Silverwastes—especially during prime time. The Silverwastes is a zone that gets better and better as more players pack into it. It’s also a very rewarding zone, with lots of great loot, titles and achievements.
Getting There
The Silverwastes is in the northwest corner of the world map. To reach it, start at the Triforge Point Waypoint in Brisban Wildlands. From there, run north through Fort Vandal and zone in.
Getting Around
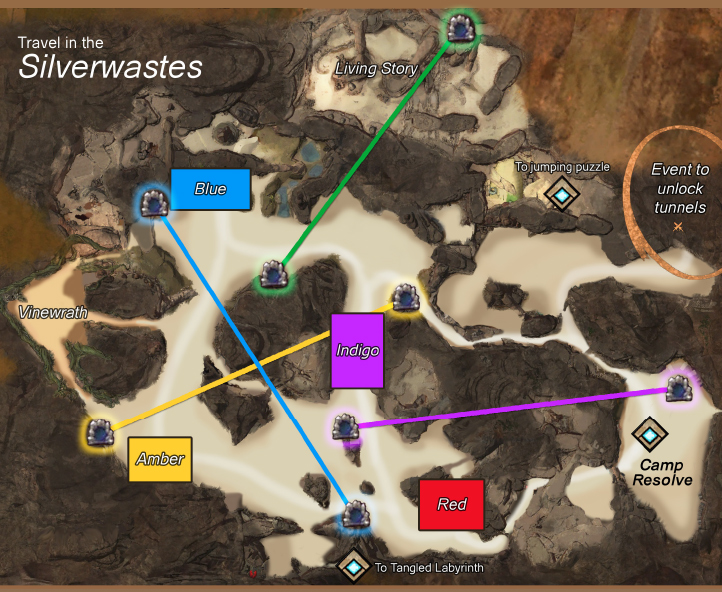
You arrive in Camp Resolve, in the southeast corner of the zone. It’s a safe spot with a waypoint and some basic services.
There are two more waypoints, but you’ll soon discover that the waypoints are too sparse to access most of the zone easily. Luckily, there’s another option besides hoofing it from place to place: skritt tunnels. Each tunnel links two spots on the map with instant travel. By the way, skritt tunnel travel is the only way to get to the Living Story area in the north of the map.
But there’s a catch. The skritt tunnels are often closed, so you’ll need to complete the “Drive the bandits out of skritt territory” event in the northeast to unlock them again. This also completes the Ambassador’s Aid achievement which awards an item you can trade for a Carapace boot box.
The route to the jumping puzzle and the vast underground region of the Silverwastes also passes through the skritt cave in the northeast. Complete the same event then look for a stairway leading down to the Drydock Grotto waypoint, diving goggles and Drydock Scratch jumping puzzle.
What to do?
Now that you’ve reached the Silverwastes, it’s up to you to decide what’s next. You can work on the meta event chain through Vinewrath, of course, and I’ll explain that in detail later in this article. First, let’s explore some of the other choices.
Titles and other goodies via achievements
The Silverwastes zone has it’s own achievements category under General, and several give you titles or armor. In addition, a few chapters of the Living Story take place in the Silverwastes and award Silverwastes-themed items, including Carapace armor pieces.
Titles
- The Annihilator: Slay the Legendary Mordrem Annihilator at Red Rock Bastion
- The Demolisher: Slay the Legendary Mordrem Demolisher at Indigo Cave
- The Executioner: Slay the Legendary Mordrem Executioner at Amber Sandfall
- The Tormenter: Slay the Legendary Mordrem Tormenter at Blue Oasis
- The Be-All and End-All: Slay all four legendary Mordrem champions
- Dark Traveler: Unlock the greater nightmare pod in Hidden Depths
- Light in the Darkness: Unlock all Luminescent armor skins
Armor
- Carapace Coat Box: Complete the Vinewrath event
Carapace Boot Box: Complete “Drive the bandits out of skritt territory” event
Carapace Shoulder Box: Complete the “Hidden Arcana” chapter of Echoes of the Past story
Carapace Glove Box: Complete all chapters in the Tangled Paths story
Carapace Legging Box: Complete the “No Refuge” chapter of the Seeds of Truth story
Carapace Headgear Box: Complete the “Mystery Cave” chapter of the Point of No Return story
Other goodies
- Skritt Burglar Tonic: Complete the Drydock Scratch jumping puzzle
Indiana Jones Mode
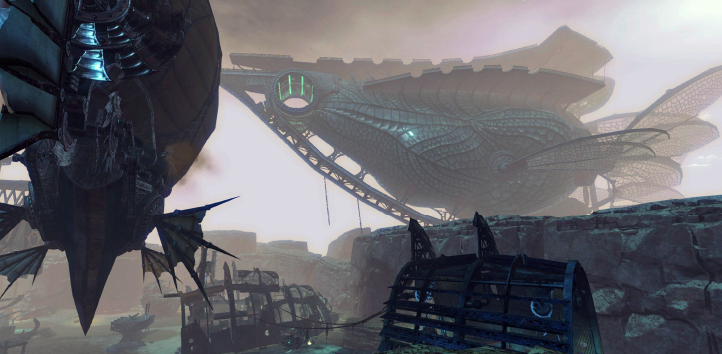
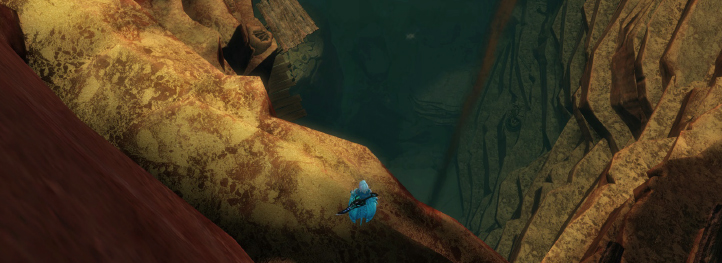
If you just feel like exploring, you are in for a treat! The forts and frenzied combat at ground level account for only a fraction of the explorable areas. There’s a whole world underground, and another high above on the mesa tops--and the scenery is gorgeous.
A great way to tour the hidden parts of the Silverwastes is to do the Drydock Scratch jumping puzzle, which starts at the Drydock Grotto waypoint. It’s much longer than most jumping puzzles, and transverses both the underground and the mesa tops. Good news for the jumping-impaired: there are very few difficult jumps.
If you’d like a guide, Dulfy has excellent one:
http://dulfy.net/2014/12/03/gw2-retrospective-runaround-jumping-puzzle-guide/
Choo-choo! Shovel Train
Running the Silverwastes meta will give you loot similar to other Guild Wars 2 zones: champ bags, crafting materials and gear drops. But occasionally you’ll also get something unique: a Silverwastes Shovel.
Each shovel can reveal a single Lost Bandit Chest. Equip the shovel and use the #2 skill, Sonar. If a chest is buried nearby, a green line will lead you to it. Once you find the mound of dirt over the chest use the #1 skill, Dig, to dig it up.
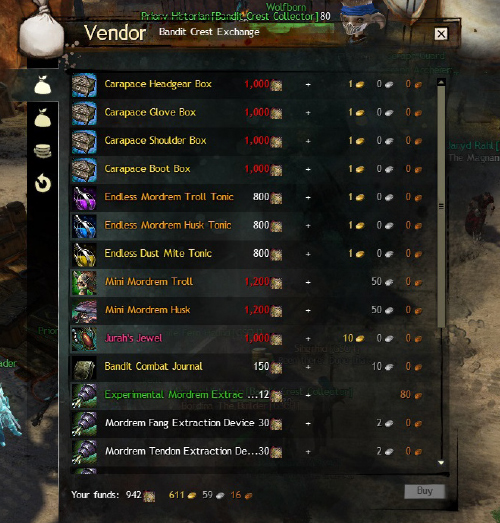
To open a Lost Bandit Chest, you’ll need a Bandit Skeleton Key. These are found occasionally in loot too, but they can also be purchased from vendors in the forts or Camp Resolve for 5 Bandit Crests each. From every chest you’ll receive a champ bag, bandit crests, ambrite, and silky sand. At level 80 you’ll also get either dragonite ore or empyreal shards. More rarely you can receive obsidian shards, Carapace boots or gloves and zone-themed mini pets, tonics and crafting recipes. It’s exceptional loot that’s very easy to obtain.
Shovels are far more rare than keys, so players often pool their shovels and move around the map in a blob (a.k.a. shovel train or chest train) to open chests together. It’s common to open 30 or more chests in a single circuit of the map, so bring plenty of keys!
The shovel train usually happens during the downtime in the zone meta cycle to take advantage of the buffs from completing the meta event. These buffs add to a player’s effect magic find, and also add bonus magic find when opening lost bandit chests.
Super Shiny Armor!
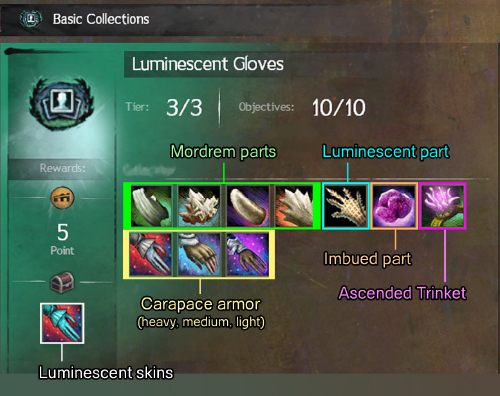
 If you like long-term goals—or just like to glow in the dark—try the collection quests for Luminescent armor. Each armor slot has it’s own collection. In addition to the corresponding Carapace pieces, you’ll need to collect parts from the Silverwastes and the ascended trinkets rewards from the 4 final episodes of the Season 2 living story.
It’s a lot of work but in the end your armor will shine like the moon while you rock the coveted “Light in the Darkness” title.
Carapace Armor
 You can obtain Carapace armor boxes uncommonly from drops, lost bandit chests and event bonus chests in the Silverwastes. Some achievements reward Carapace armor as well (see “Titles and other goodies via achievements” above). You can also purchase Carapace armor boxed from the vendor in Camp Resolve for 1000 bandit crests and 1g each.
The exception is the Carapace Coat Box. This comes from only one source: Vinewrath. You are guaranteed a coat box the first time you beat the Vinewrath fight. After that, it’s an uncommon drop from Vinewrath, so expect to fight Vinewrath event several more times to get all three Carapace coats.
Mordrem Parts
 You have to extract these (ewww!) from Mordrem bosses during The Breach and the Vinewrath events.
Use an Experimental Mordrem Extraction Device before jumping into the Breach, and another before the Vinewrath event. After that, get at least one good hit in on the boss. Win or lose, an Extracted Part Bag containing a Mordrem part will drop into your inventory. Opening the bag will automatically update your collection. Simple!
The wrinkle is that you need specific parts for each collection. For example, the Luminescent Gloves collection requires Mordrem fangs, one from each type of Mordrem boss: teragriff, husk, troll and thrasher.
To find a the right type of Mordrem boss you need to join the Breach at a specific fort:
- Husk: at Red Rock Bastion
- Teragriff: at Indigo Cave
- Troll: Amber Sandfall
- Thrasher: Blue Oasis
To guarantee you get a specific body part—say, an eye—use an extractor that targets that body part. Both the experimental and specialized extractors can be bought from vendors in the forts and Camp Resolve.
After collecting the part, trade it to the Krewe Researcher NPC for more badges. He moves to a new spot in the zone every 30 minutes, and is marked on the map with the collections symbol.
Luminescent Parts
To obtain these, first get at least three stacks of the Perseverance buff by defending forts, collecting rubble, escorting supply caravans, and other zone events. Then talk to one of the fort quartermaster NPCs, and choose the ‘Prove your perseverance’ option. Select the luminescent part you want to add to the collection.
You can vendor the part immediately for 25 silver.
Imbued Parts
These parts are ordinary items drops, event trophies or heart NPC items collected elsewhere in the world and then imbued in the Silverwastes during the Breach.
To imbue an item, jump down into the breach then interact with the Luminescent Pollen Cloud next to the exit.
- Headgear: Dragonfly-Wing Earrings - Purchase from heart NPC Cook Huelic in Michoan Marsh, Metrica Province
- Shoulderguard: Firefly Luminescence - Event trophy from “Give firefly luminescence to Warden Annwyn” in Village of Astorea, Caledon Forest
- Coat: Large Skull - Mob drop, or purchase from Trading Post
- Gloves :Matlal Enchanted Pig Truffle - Purchase from heart NPC Matlal in Eukaryan Caves, Kessex Hills
- Leggings: Powerful Venom Sac - Mob drop, or purchase from Trading Post
- Footwear: Beetle Remains - Event trophy from “Gather insect parts from nearby beetles” in Challenger Cliffs, Dry Top
Ascended Trinkets
Obtaining the ascended trinkets can be the most challenging, time consuming and expensive part of completing the luminescent collections.
- Headgear: Jurah’s Jewel - Purchase in Silverwastes for 10g + 1000 bandit crests, or for 30 laurels from a laurel vendor
- Shoulderguard: Caithe’s Blossom - Complete all Echoes of the Past achievements
- Coat: Caithe’s Remorse - Complete all Point of No Return achievements
- Gloves: Plague Signet - Complete all Tangled Paths achievements
- Leggings: Verata’s Seared Ring - Purchase in Silverwastes for 10g + 1000 bandit crests
- Footwear: Wynne’s Locket - Complete all Seeds of Truth achievements
If you find a particular achievement too challenging, having more people can help a lot! Try finding (or starting) a group in party finder or guild. Dulfy.net is an excellent resource for guides and videos.
- Echoes of the Past Achievement Guide
- Tangled Paths Achievement Guide
- Seeds of Truth Achievement Guide
- Point of No Return Achievement Guide
The Silverwastes Meta
And now for the main event! The Silverwastes features a meta event cycle that’s a challenging mashup of WvW-style siege warfare, large scale zone boss fights and the frantic haste of a guild rush.
Two of the events—The Breach and Time Out—are timed. For the others, you must complete the objectives to advance to the next event. When the Time Out countdown reaches zero the cycle starts over with the Foothold event.
Numbers help enormously to complete the meta cycle quickly and successfully, so use the LFG tool to taxi into a well populated map (or fill your own map).

Foothold
The goal of the Foothold event is to fill the “Pact Assault Preparations” gauge as you protect and upgrade forts, escort supply caravans and fight off the Mordrem.
More and better siege equipment appears as you upgrade a fort; however, two of the best defenses are almost always available.
First, burning oil. It works great, far better here than in WvW, since mobs aren’t smart enough to avoid it. Just two players can wipe whole waves of attackers by pulling them into the oil. Be sure to Pour Tar occasionally: the Mordrem will be stuck in the fire until dead.
Your other secret weapon is the air strike. To call in an air strike grab a “signal torch” (there are several in every fort) and use it to light the fort’s signal fire. The signal fire is high up in the fort, on a wall or ledge. Fifteen seconds after the fire is lit, the bombs fall doing massive damage to the Mordrem horde.
The Breach
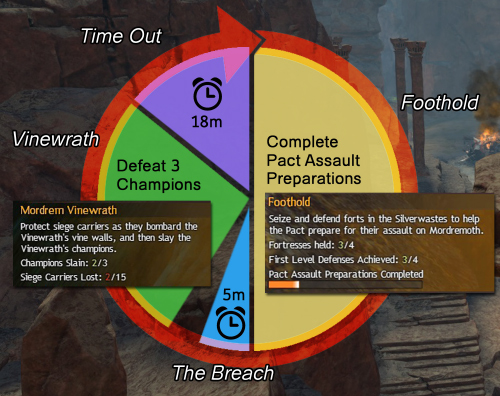 The goal of The Breach event is to kill the 5 champions under the forts in 5 minutes.
Remember the scene from Star Wars where Jabba the Hut forces Luke to walk the plank over a huge, nothing-but-teeth sand pit monster? Well, the sarlacc makes a cameo for The Breach event. Four of them, actually—one under each fort.
Hop in! Aim for the the center to reduce falling damage. Once inside, you’ll need to kill a Mordrem champion. If you are collecting Mordrem parts for luminescent armor be sure to use an extractor now.
The fight mechanics differ by fort. Here’s a quicky strategy for each fight.

Champion Mordrem Husk Copper
The champion at Red Rock Bastion is a high defense melee fighter. He spawns numerous Mordrem Husk Offshoots which move as a pack and can easily overwhelm a player with bleeds and cripple. If you find yourself focused by the offshoot pack, stealth or kite until they shift to another player, or use skills that block or reflect projectiles.
The husk champ also spawns bubbles that heal him if they are close to him when popped—about 2% per bubble. Popping the bubbles will also poison nearby allies.
Strategy: Pop bubbles away from the champ, avoid offshoots, DPS.
Champion Mordrem Teragriff Silver & Champion Mordrem Teragriff Gold
This pair of champions at Indigo Cave can put up a very tough fight. The fight takes place in a narrow, donut-shaped cave--perfect for these giant teragriffs to bowl right over you.
Just to make things more fun, you can’t damage the champs unless you use a special fight mechanic: pop a bubble near a champion to stun it, then DPS like crazy. When the stun wears off, the champ will become invulnerable again and dash off in the opposition direction.
Popping them prematurely almost always causes the fight to fail since no bubbles means your team can’t stun the champs to DPS them.
Another fight mechanic that kills quite a few players is the champs’ Shriek attack with a 600-radius AoE that does 2000+ damage per tick. This attack occurs when the champs meet face-to-face at the same point of the racetrack. (Fortunately, you can see this easily on the minimap.) Watch out for it as you are chasing after the the champs.
Strategy: Hug the walls, pop bubbles close to a champ, burst DPS on stunned champ, stay far away from Shrieks.
Champion Mordrem Troll Iron
This champ spawns under Amber Sandfall. He’s a melee fight that can launch and cripple players. He also summons Veteran Mordrem Trolls as allies and revives any that die at specific phases in the fight.
His biggest attacks are ground targeted. At 80% health he starts to use a wedge-shaped, melee-ranged attack. At 40% health he switches to a donut-shaped AoE that affects the entire room.
Strategy: Avoid the veteran trolls (don’t kill them), dodge ground AoEs, DPS champ.
Champion Mordrem Thrasher Platinum
The champion under Blue Oasis teleports, a lot. The fight takes place in a large cave that’s roughly square in shape, and each teleport moves the champ to the next corner of the square moving in a clockwise direction. You’ll know he’s about to teleport when he becomes invulnerable to attacks.
At 50% health bubbles will spawn near the champ. Popping the bubbles charges a large AoE pull-then-poison attack by the champ.
Strategy: DPS, then chase when champ teleports. After 50% be ready to double-dodge out of the champ’s pull-then-poison attack.
Vinewrath
 The Mordrem Vinewrath event is a coordinated, level 80 encounter similar in scale and complexity to fighting Tequatl. And like Teq, it’s quite common to taxi more people into the map to have an adequate force for the fight.
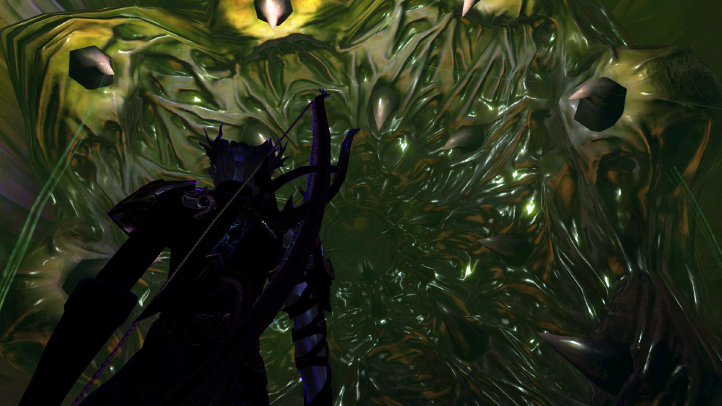
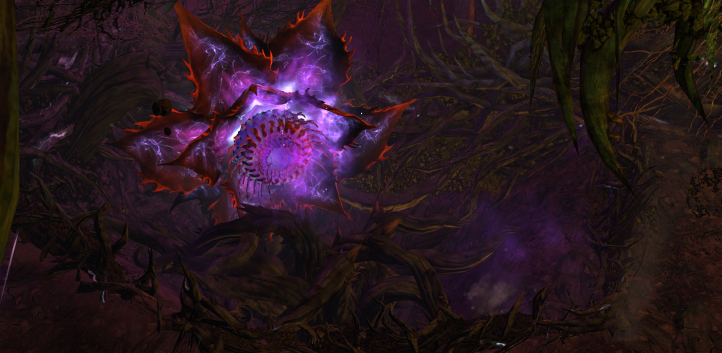
This handsome thistle is the Vinewrath, and it’s just a spectator for this battle. Instead you must defeat each of it’s three Legendary champions in turn. Divide your forces into three teams—one for each lane: south, mid and north.
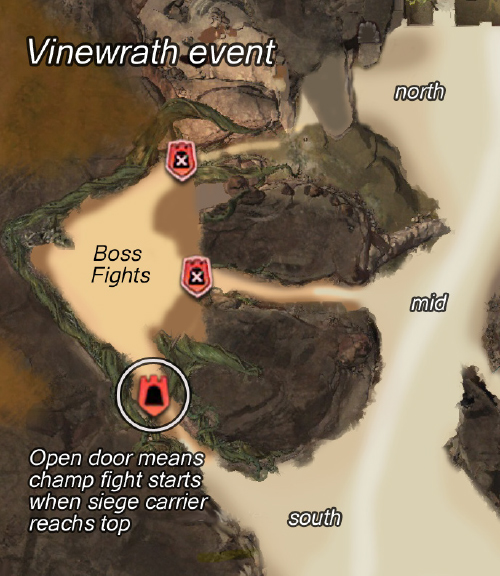
Each lane must protect its Pact Siege Carrier and ammunition stockpile as the carrier tries to blast its way through the barrier shielding the Vinewrath’s champion. Of course, the many Mordrem that spawn will try to kill both the siege carrier and the ammo, so you’ll need to clear them as quickly as possible. It’s possible (and extremely helpful) to heal and stealth the siege carrier.
The barrier in a single lane becomes vulnerable to the siege carrier’s attack when no boss fight is currently underway. First up is the south lane, immediately after the event starts. An “open door” icon on the minimap shows when a barrier is vulnerable. Escort the siege carrier to the barrier to open the path to the boss fight.
After the south lane finishes their boss fight (win or lose), the barrier for the middle lane becomes vulnerable. Next it’s north lane’s turn. The cycle repeats until all three bosses are successfully defeated, or the event fails.

Killing the Legendary Champions
The Legendary champions must be defeated in order: Beekeeper, Mangler, and Dark Wing. When all three champions are dead, run back into the Vinewrath’s lair to loot the chest.
These fights are fairly straightforward, but there are a few mechanics you should be familiar with.
Avoid the “raid wipe” attack. Each of the three champs has a “raid wipe” attack. When the champ runs to the far side of the room, near the Vinewrath, you’ll know it’s about to happen. The way to avoid it is to stack in the safe spot. Most of the other players will be running to the safe spot, so follow the pack!
Where to stack:
- Beekeeper—behind a honeycomb
- Mangler—in the white cone-shaped area in front of the boss
- Dark Wing—on an open flower
Beekeeper is about the bees. DPS the boss and avoid the allies he summons. If you get a swarm of bees on you run to the honeycomb to build it up prior to the “raid wipe” attack.
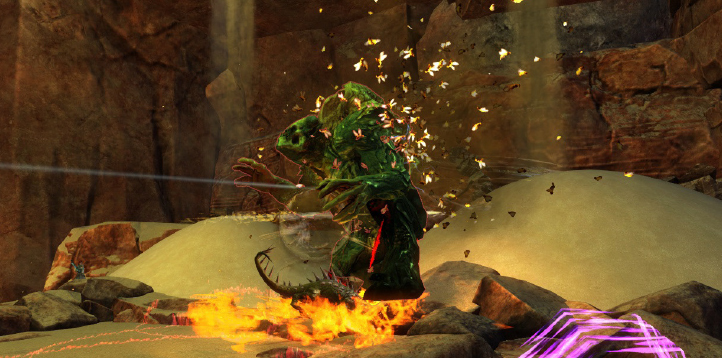
Mangler is pustule powered. DPS the boss and avoid his AoE attacks. If you have a reflect skill, the best time to use it is when he is spinning. It’s very important to clear the pustules that spawn around the room since these greatly increase the area and power of his AoE poison attack. As you kill a pustule stand in the white circle created to receive a powerful DPS buff (and a nifty purple paint job).
Dark Wing is about the daisies. DPS the boss, and avoid his teragriff-style charges and shrieks. DPS the unopened flowers to ensure you’ll have one to stand on for his “wipe ride” attack (which turns the floor of the entire room to lava).
Failing the Vinewrath Event
The Vinewrath event fails when 15 siege carriers are lost.
A failed attempt to kill one of the Legendary champs doesn’t necessarily cause the event to fail, however it does cause 3 siege carriers to be lost. If 15 siege carriers haven’t been lost yet the next lane will fight the same Legendary champ.
Time Out
The last event in the Silverwastes meta is the aptly named Time Out. It’s 18 minutes to clear your bags, harvest, and explore before the next meta cycle. Since the map is relatively quiet, the shovel chain often happens during Time Out.
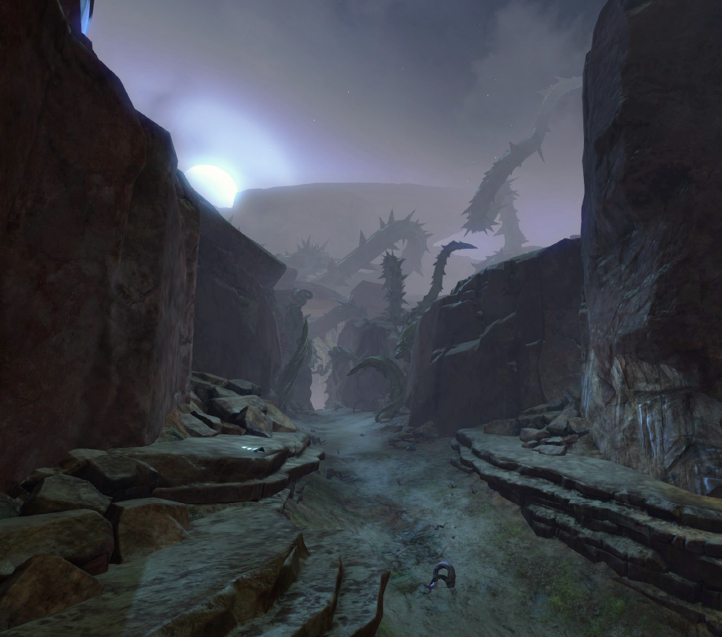
The Tangled Labyrinth
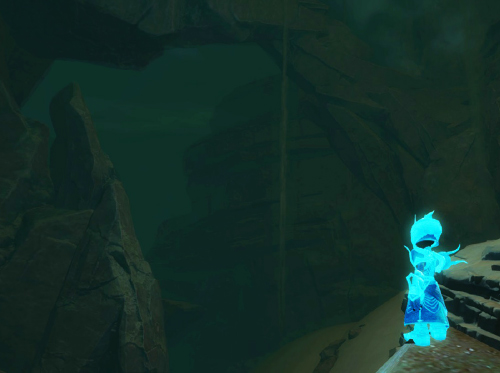
For something more challenging, visit the Tangled Labyrinth (which is open only during Time Out). Start from the Hidden Depths waypoint and run downhill. You’ll find an underground maze filled with ghostly green Mordrem wolves that are faster and far more deadly than their cousins up on the surface. You’ll also find lots of chests with loot.
Navigate the labyrinth like you would a guild rush. Watch the minimap for approaching wolves and hop onto a flower to transform into “Cold Light” when they are close. You’ll have super speed for 10 seconds and a skill that will stun nearby wolves, helping you escape.
About Guild Wars 2
Guild Wars 2 is an online role-playing game with fast-paced action combat, a rich and detailed universe of stories, awe-inspiring landscapes to explore, two challenging player vs. player modes—and no subscription fees!